
-
As a photojournalist, I’ve seen people make easily avoidable mistakes with their phone cameras.
-
Lighting and angles are everything.
-
For example, lighting your subject from the front, rather than the back, will result in a better photograph.
I went to photography school and now I’m a photojournalist traveling around the world.
I didn’t have a camera growing up, so my first phone introduced me to the craft. Without it, I’m not sure where I would be.
While I’ve heard many photographers complain about the abundance of photography in the age of phone cameras, I feel the opposite. I love that anyone can pursue photography and want to help people take better photos.
So I identified common mistakes I see mobile photographers make and outlined how to avoid them.
Underexposing your photos is a classic mistake
In my opinion, one of the keys to successful photography is proper exposure. The image should not be too dark to see shadows, nor so bright that parts of it are blown out.
I often see phone images that are too dark or too bright, so it’s worth checking if your smartphone camera allows you to manipulate the exposure before taking a photo.
On an iPhone, you can easily control exposure. Simply tap the screen in camera mode and you’ll see a sun appear. You can move the sun up and down to find the right exposure.
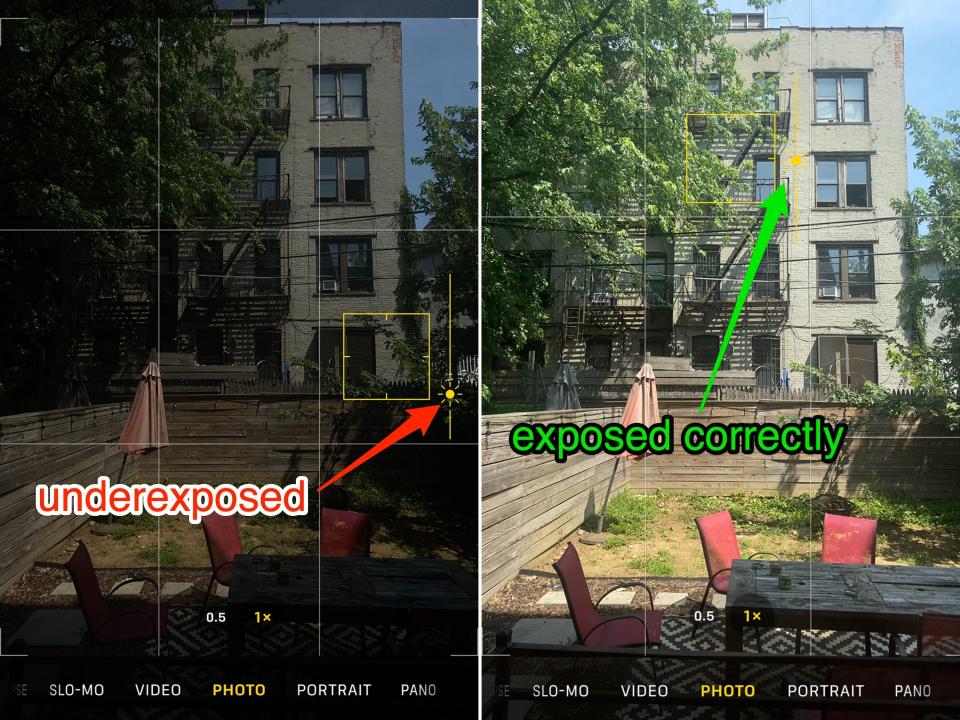
I found that adjusting the exposure is especially helpful when taking photos in low light situations.
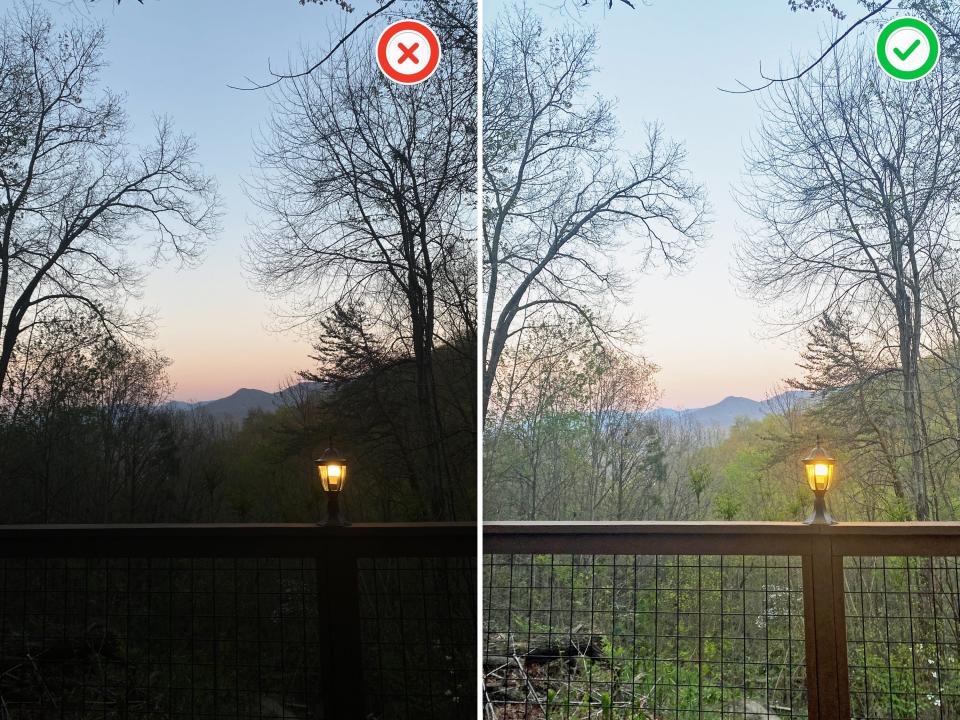
In the images below, I wanted to capture a sunset landscape just outside of Great Smoky Mountains National Park. In my first photo, on the left, I let my iPhone automatically select the exposure, but I couldn’t see the detail in the shadows. So for the second image, I increased the exposure just enough to capture the foreground landscape without blowing out the sunset.
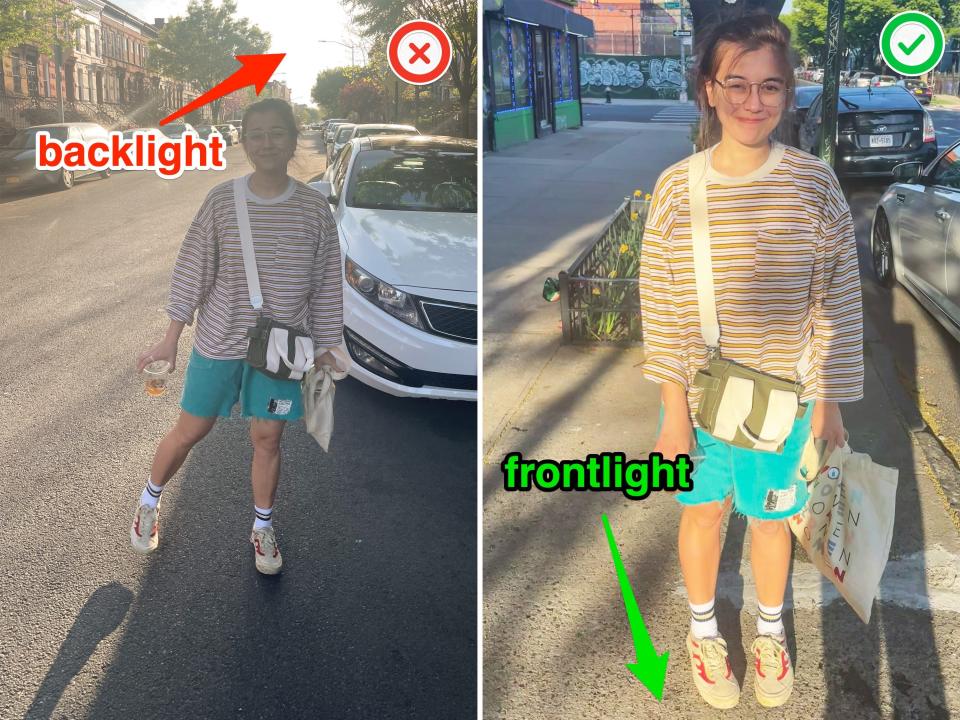
Lighting your subjects from behind is another no-no.
Unfortunately, not all lighting is uniform.
When the sun illuminates only part of the scene, I tend to see subjects standing in front of the light source. But lighting from behind makes the entire front of the subject look too dark.
When I see people taking portraits like this, I want to shout, “Turn around!”
Lighting objects from the front means the light will be facing them, which I find generally results in a better image.
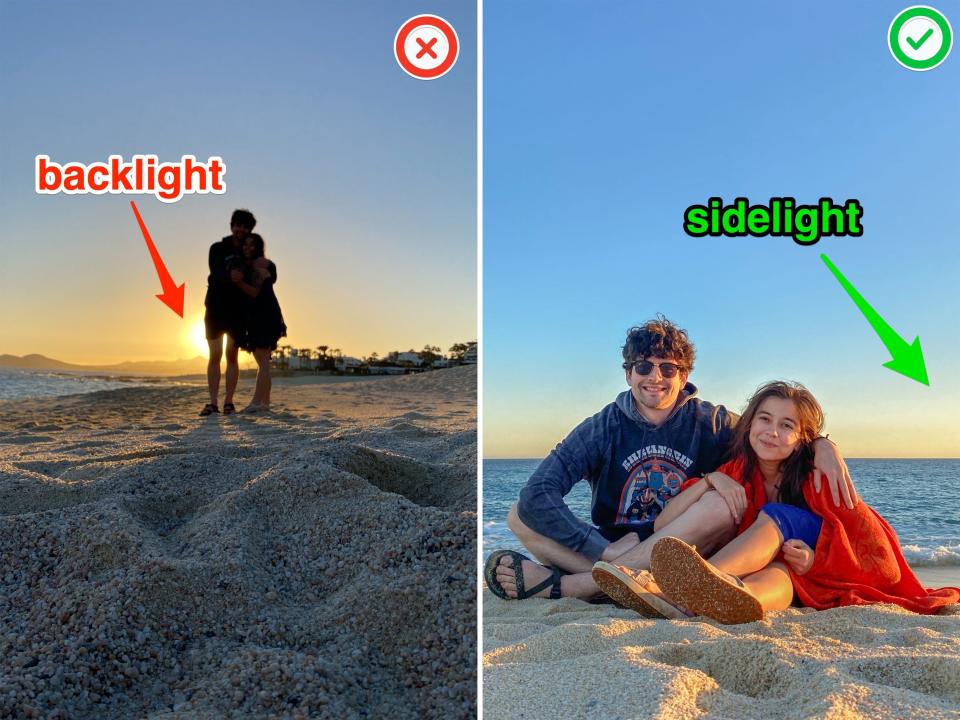
Sometimes, however, the background you want includes a light source, such as a sunset.
In these cases, I have tried an alternative strategy: lighting from the side. This way I can still capture the light and color of the sunset without obscuring my subjects by having the sun in the frame.
The following images of me and my partner on a beach in Mexico are a good example.
Shooting only at eye level is a wasted opportunity
For tips on phone photography, I recently turned to Kiliii Yüyan, a National Geographic photographer who tells stories about how different cultures relate to the environment, from the Amazon to the Arctic seas.
He mentioned that he often sees people who default to shooting at eye level with their phones, noting that this doesn’t always produce the most interesting shot. I agree.
To find the perfect angle, Yüyan said you have to start by considering the ways that shooting with a phone (which is light and thin) can open up a whole world of possibilities.
“A good criterion is to see how much depth an angle will show in a photograph,” Yüyan said.
For example, he said that when photographing a child, looking at them from one angle will usually come off as flat and boring. But shooting from below the child’s eye level looking up can better show the layers of the person and everything above them.
“We rarely get below child-level to look at the world, and that perspective can be magical,” he said.
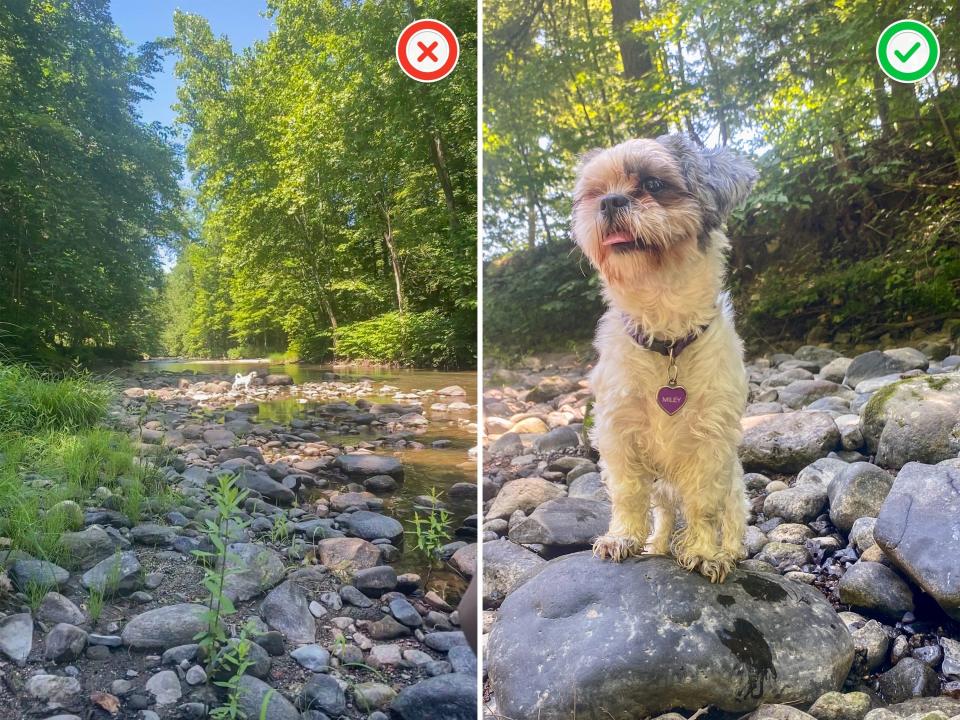
Yüyan’s example reminded me of how I photograph my dog when we are outdoors. When I photograph her from above or from the front, I can’t capture her expression or her personality, which makes the photo seem boring to me.
But when I took the photo pointing up from ground level, I could see her exploratory nature and the way she uses her surroundings to make herself feel bigger, like she’s sitting on top of a rock at the edge of a stream.
No matter what you are photographing, take your time, think about the light and angles and shoot.
Read the original article on Insider


