Next time you’re on the driving range, avoid these common mistakes.
Image via John Hughes
Welcome to Shaving Strokes, a GOLF.com series where we share improvements, learnings and takeaways from amateur golfers like you, including some of the obstacles and challenges they faced along the way.
In my nearly 30 years of playing golf, it’s funny how hitting balls on the driving range has changed.
When I first started playing, I would just take out my driver and try to hit balls as far as I could. I had no intention or structure in what I did as I was a kid just trying to learn the basics.

Wyndham Clark taught me 6 driving range secrets in 30 minutes
Dylan Dethier
As I’ve gotten older and wiser about my game, I’ve adapted my driving range strategies and now use a more focused practice technique that mimics certain scenarios I might see on the course. I also use training aids and other technology that gives me instant feedback.
While practice is always a good thing, perfect practice is what will truly positively impact your golf game; It just took me a while to understand that.
So instead of just going to the driving range and making the same mistakes, which don’t lead to improvements, it’s time to adjust things. With the help of golf teacher John Hughes (who offers tips below), you can identify seven common practice mistakes, learn how to overcome them, and start seeing the benefits you’re looking for.
7 Things You’re Doing Wrong on the Driving Range (and How to Fix Them)
I spend a lot of time on the driving range watching players hit balls. Whether they’re warming up before a round or just practicing to improve, most amateur golfers look and act the same on the course – and that’s not necessarily a good thing!

Controllable and uncontrollable: how understanding them will help your golf game
Nick Dimengo
Since golf is an uncontrollable game, there are some controllable that every player should understand. If you can master them, you will improve your scores almost instantly.
Unfortunately, most amateurs don’t, especially on the driving range.
So what are they? I suggest checking off the following seven items before you shoot, meaning they are totally within your control. And here’s the best part: they are not techniques, but simple pre-shot improvements that will put you in a better position to get down low.
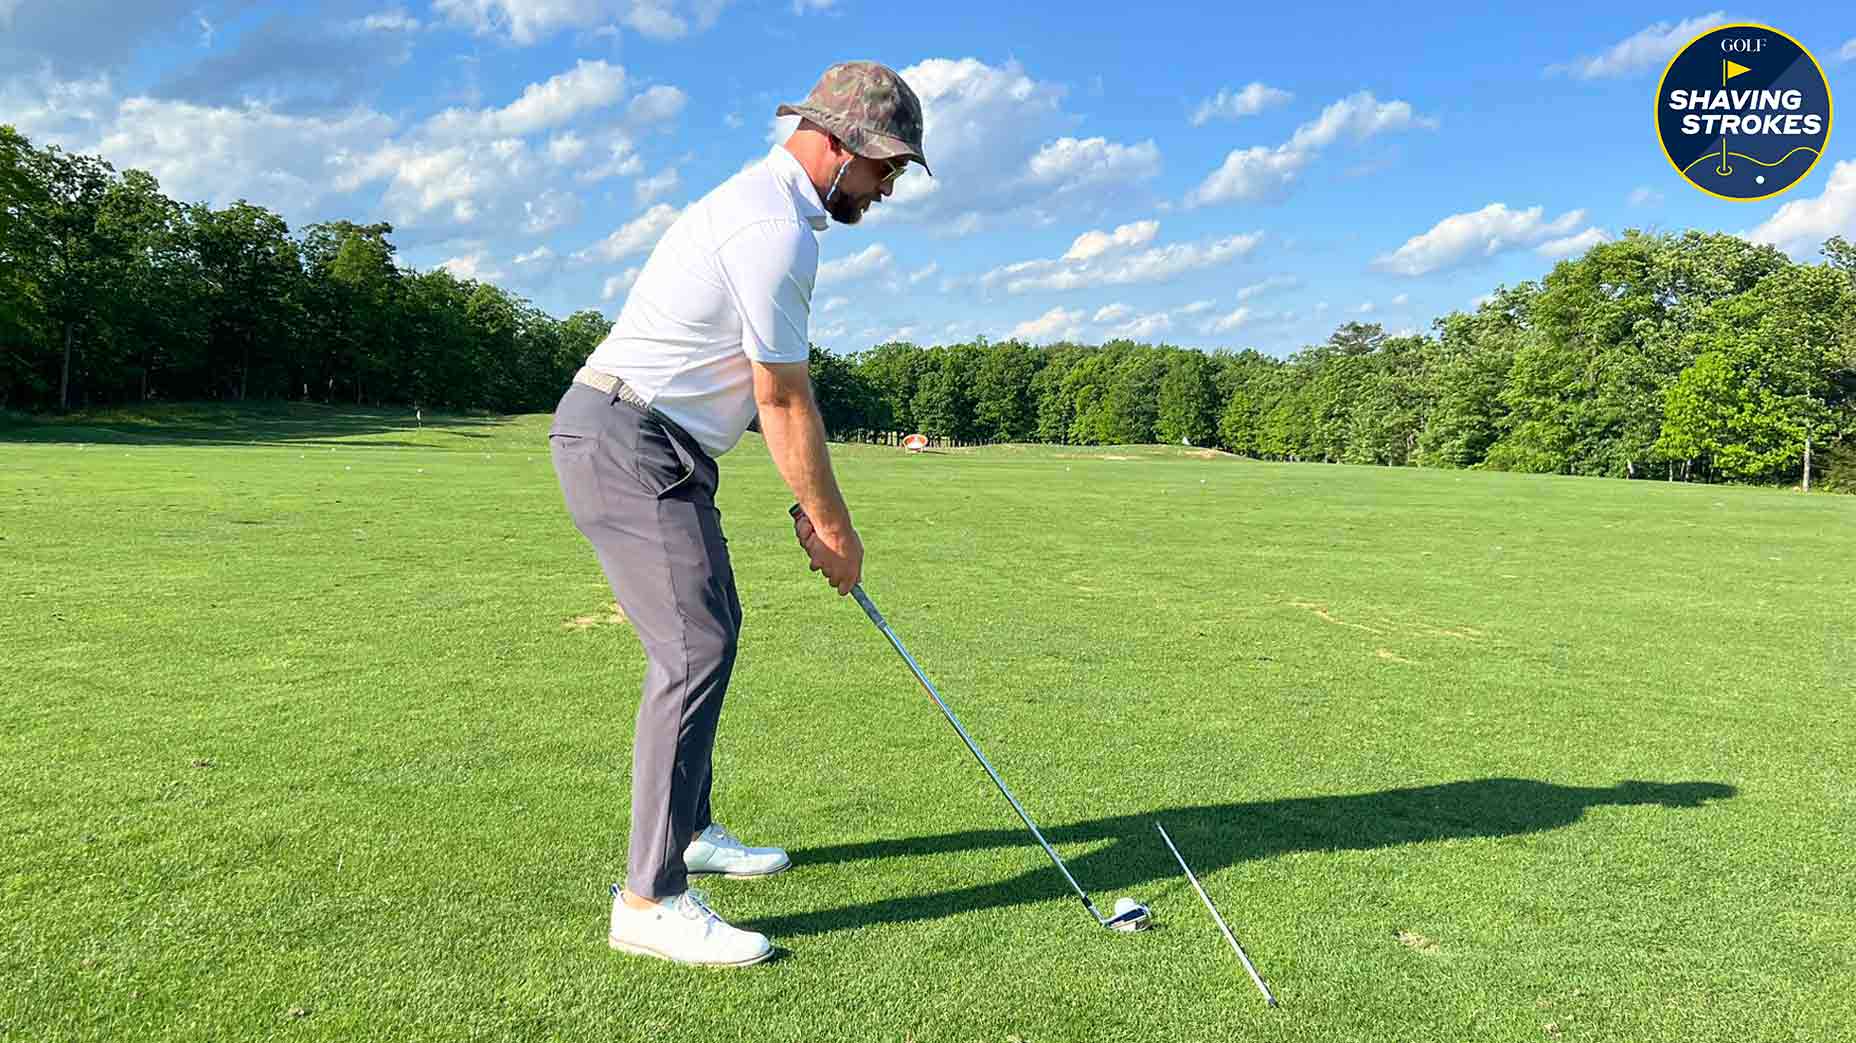
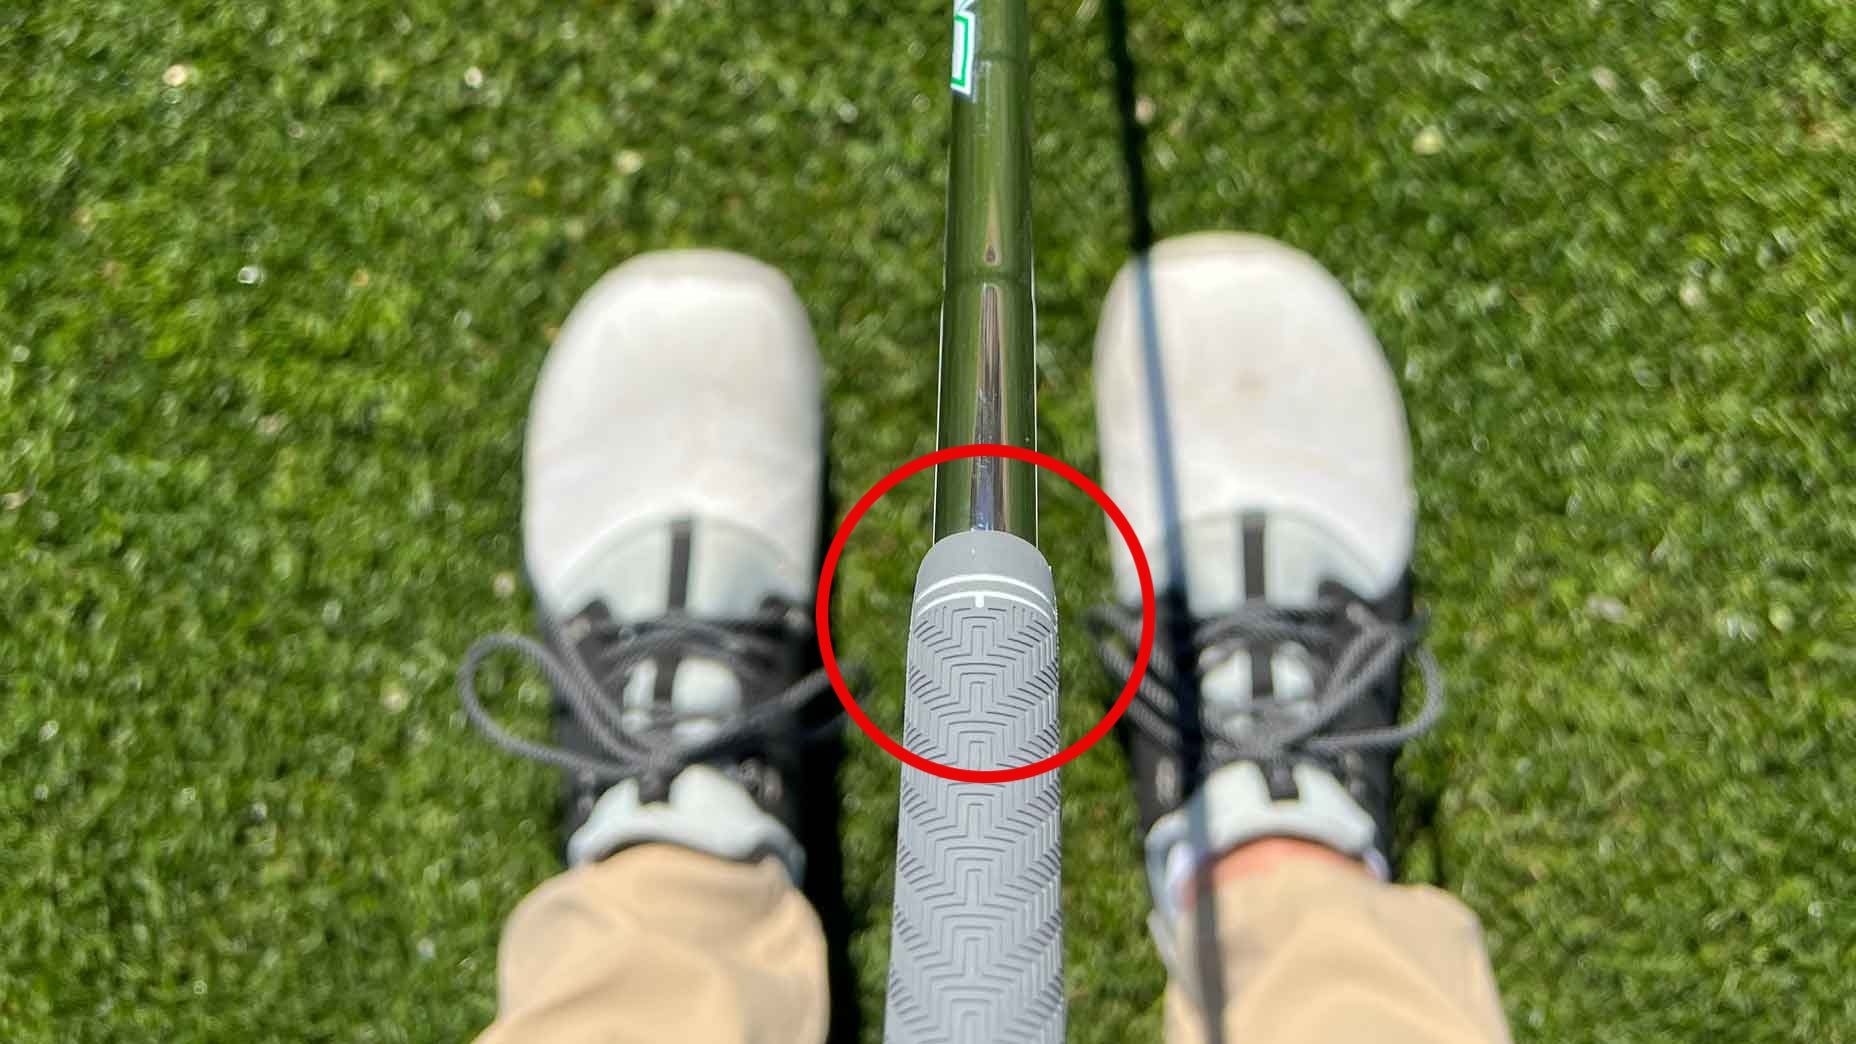
1. Incorrect use of alignment bars
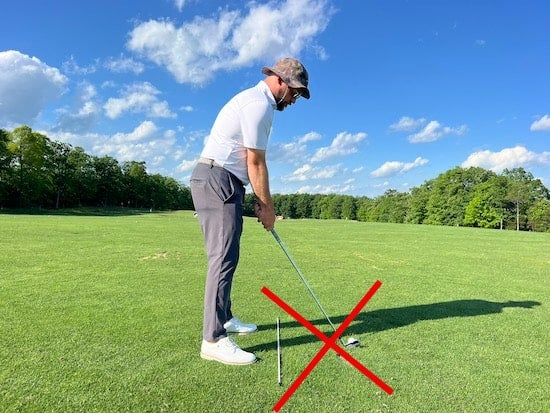
Image via John Hughes
If you ever watch a pro warm up on the driving range, they always have alignment levers somewhere nearby and use them in multiple ways. Most golfers emulate what they see their favorite player do when they practice, without any knowledge of how the golfer actually uses these simple yet highly effective training aids.
If a club is used with the ball on one side and the golfer on the other, contrary to what you may believe, the golfer is most likely not working on the alignment. Unfortunately, what most amateurs do is point the club at the target and place the ball on the opposite side, which immediately causes you to aim directly at the target.
Instead, try placing the ball on the same side as you, which will help you work on both aim and alignment, and also allow you to perform an easy movement drill. Simply place the ball about the width of the clubhead away from a club that is pointed directly at your target. You are now in the proper alignment position as you work on your drill.
2. You are too far from the golf ball.
When you are too far away from the golf ball, you create a lot of room for the clubface to open and close. The club is hinged at the neck, which creates the opening and closing of the club as it swings back and through the golf ball. The more horizontal your swing, the more the face will open and close, and the more you will need to square the clubface at impact.
You would be surprised how getting even a quarter to a half inch closer to the ball will reduce the amount of face rotation in your golf swing and, in turn, eliminate some unwanted curvature in the ball flight.
3. Your clubface is not square to the target at address.
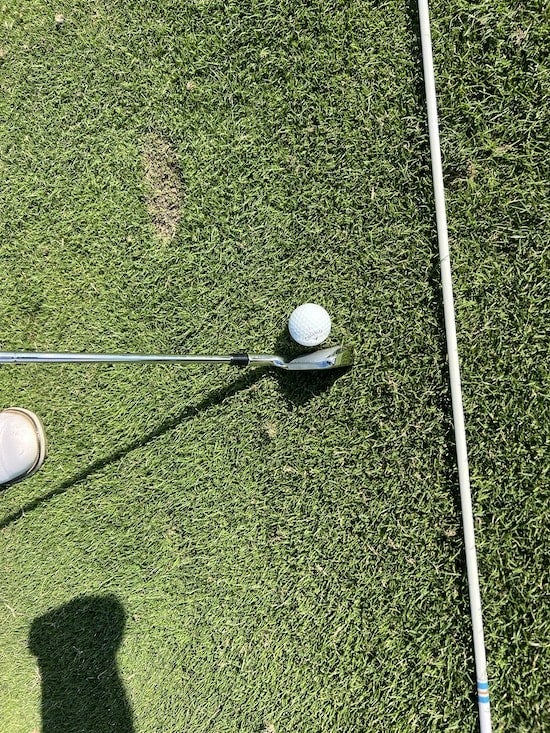
Image via John Hughes
Yes, that’s correct. As much as you think your golf club face is perpendicular to the intended target, it’s not! In most cases, the face is closed to the target, regardless of which side of the ball you’re on.
The most basic reason is simple: you forget that your body does not hit the ball, the club I can’t tell you how many golfers on the driving range aim at the target, especially with their front shoulder, and then adjust the club to their body. This is not correct.
4. Do not use the front edge to aim
The leading edge is called the leading edge for a reason: because it brings the club toward the ball and, in turn, creates the 90-degree angle you need on approach to have any chance of hitting straighter shots.
If you have been told to aim with the club, not your body, and the club is still closed in the starting position, you are probably using the top of the club and its raised face as an aiming device. But by doing this, it actually closes the stick.
Using the single club alignment method I mentioned above, you should visually see that the leading edge of any club creates a 90 degree angle with the club. When you do this, the club will now be aligned with your target, so you will be ready to position your body based on the position of the club.
5. Bad balance

Image via John Hughes
You’re only going to swing the club as fast as your body can balance the motion, so if you’re too far away from the golf ball, you’ll be alert in the motion. This will put your balance into panic mode, trying to keep you from falling over as you swing.
Ideally, you should feel well balanced from your feet to your waist, from side to side and from heel to toe.
Secondary shaft tilt is primarily due to the clubhand being below the clubhand, which, for most shots, is a significant tilt. The only time you should exaggerate the tilt from the belt up is when using the driver.
6. The position of the ball does not match the bottom of the arc of your swing.
The main reason you hit fat or thin shots is because your club doesn’t hit the ball before you reach the lowest point of your swing.
If you’re like most of the amateur golfers I see on the driving range, you’ve probably positioned the ball further forward in your stance than necessary. Remember that the club swings in an arc that is neither horizontal nor perpendicular, but rather at an angle. So when the club reaches the end of that arc, it begins to move up and around its front end.
I suggest simplifying your ball position by placing it in the middle of your stance when using mid to low range irons and wedges. This will help the club make contact with the ball just before it hits the ground.
7. Grip and safety position
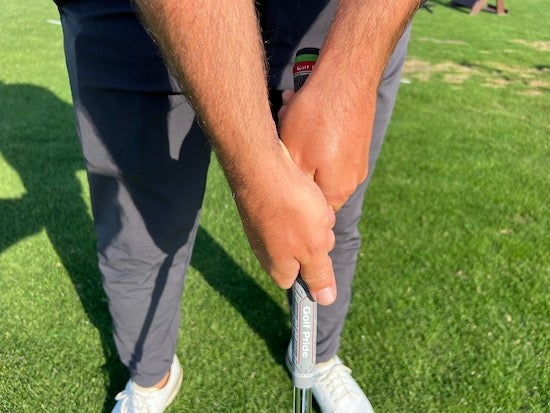
Image via John Hughes
When watching players on the practice range, I often see that the hand position is incorrect and that the top hand grips the club too tightly. First, let’s address those issues.
First, make a fist with both hands and try to move them quickly. Now, relax your hand and make it move quickly. The looser hand will always move faster. When you hold the club with a tight grip, there is no way you can hit the ball as far as you could, which is why a good top-hand grip position is essential to create a more relaxed (but secure) grip.
This simple grip trick will confirm if your clubface is square in the direction
Nick Dimengo
Now let’s study your arms and hands.
Look in a full-length mirror and notice the angle at which your hands hang from your arms in relation to your body. It’s very unlikely that your hands will be parallel or perpendicular to your body, so it’s your job to position your top hand on the club, which will replicate the natural position of your arm at impact. This is often described as a neutral grip position, and neutrality is slightly different for all golfers as we’re all built slightly differently.
To implement a neutral top-hand grip, rest the club on the second knuckle of the top hand. Next, close your fingers first and then let the rest of your hand wrap around and cover the grip, with your thumb on the opposite side of the grip. You have just achieved your first neutral grip position, which should add greater security to the club during the swing.
Nautical
$79
100% Genuine Walnut Length: 45″ / Diameter 3/8″ Medium Dark Stain Navy/White Color Combination Glossy Protective Coating Nickel Caps High Quality Golf Alignment Sticks
Buy now
View Product